


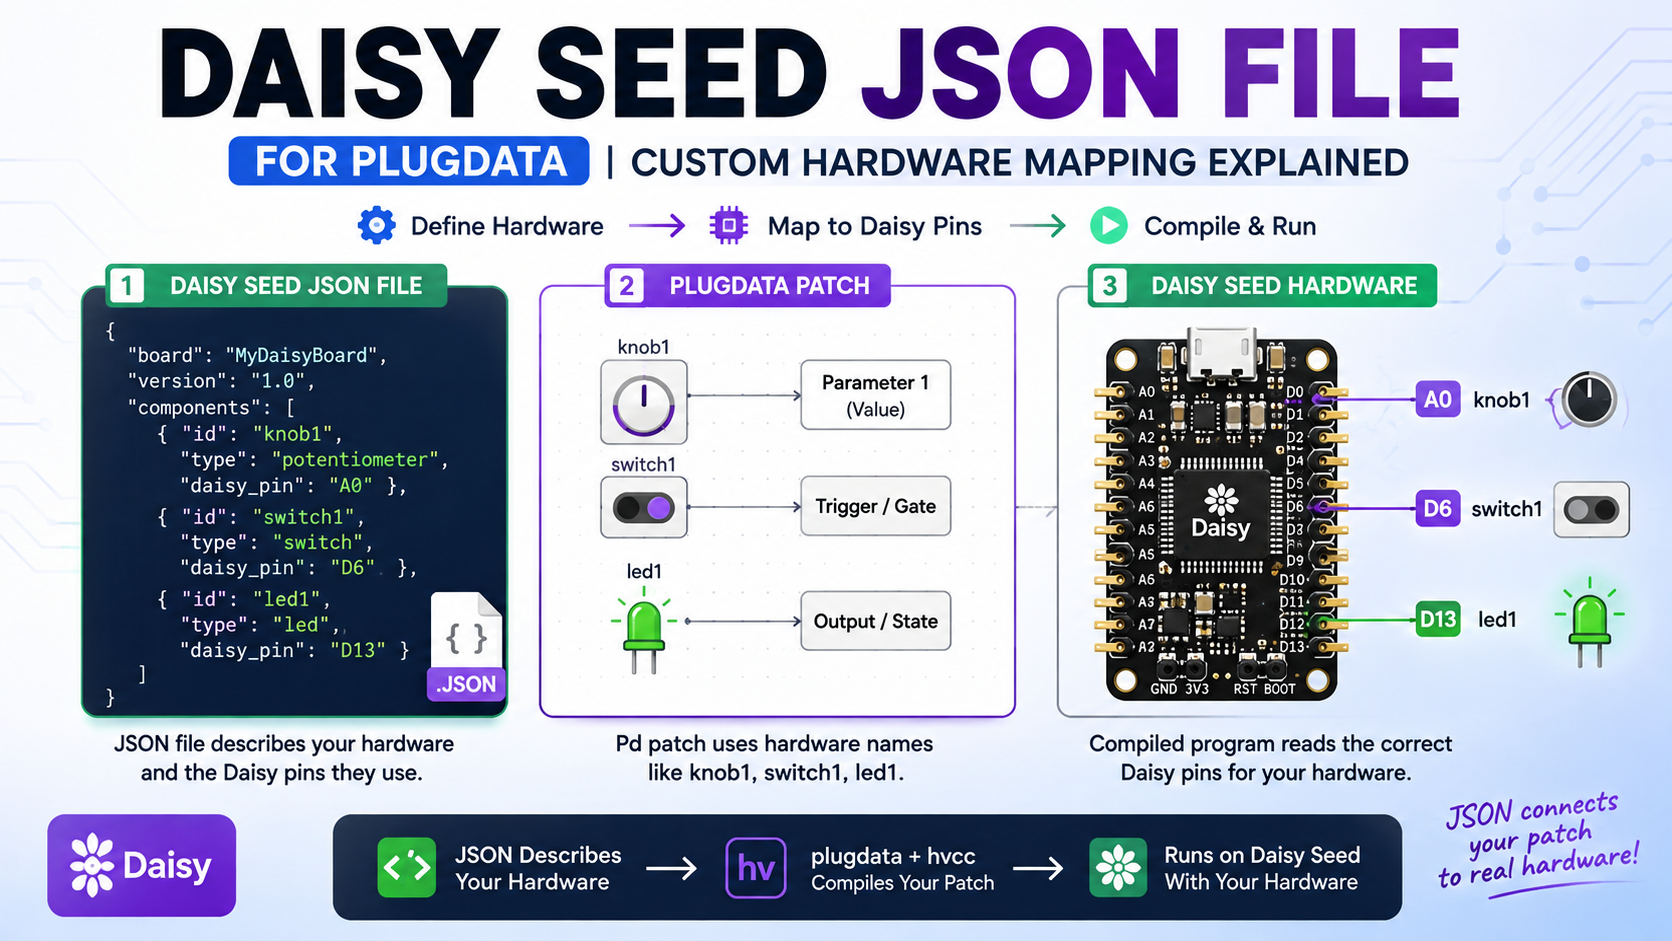
A Daisy Seed JSON file in plugdata is the configuration that tells the compiler what physical hardware is connected to a Daisy-based project. It can define things such as potentiometers, switches, LEDs, encoders, gates, and other supported components, along with the Daisy pins those components use.
This matters because a plugdata patch can know that it wants a parameter called knob1, but the compiled Daisy program still needs to know which physical pin supplies that value. The custom JSON file provides that missing connection between the Pure Data patch and the hardware. Electrosmith’s json2daisy utility converts these JSON board descriptions into libDaisy-compatible C++ support code, while plugdata uses its Heavy/hvcc compilation workflow to turn compatible Pd patches into code that can run on Daisy hardware.
For anyone searching for a “daisy seed json file plugdaisy” or a plugdata Daisy Seed custom JSON file, the important idea is simple: the JSON describes your hardware layout; the Pd patch describes what that hardware should do.
What Is a Daisy Seed JSON File?
A custom Daisy JSON file is a hardware description file.
It does not contain your synthesizer algorithm, effects processing, or musical patch. Instead, it tells the Daisy compilation system things such as:
- Which Daisy system-on-module is being used
- How many audio channels are required
- Which controls are attached to which pins
- What type of each control is connected
- What names those controls should have inside the Pd patch
- How supported peripherals should be initialized
Electrosmith’s json2daisy project describes JSON as the format plugdata can use to translate a Pd patch into something suitable for a Daisy-based board. The utility specifically converts JSON board definitions into valid libDaisy-compatible C++ board-support files.
Think of the JSON as a wiring map.
Suppose you solder a potentiometer to Daisy pin 16. Your plugdata patch might want to call that control filter_cutoff. The JSON can tell the compiler:
filter_cutoffis anAnalogControlconnected to pin 16.
The patch can then receive filter_cutoff as a hardware parameter instead of having to know the electrical pin number itself.
Why plugdata Needs the JSON File
plugdata is built around Pure Data (Pd), a visual programming environment for audio. Its compilation workflow uses the Heavy compiler to generate code from compatible Pd patches. For Daisy targets, plugdata can compile and flash that generated code to Electro-Smith hardware.
The important distinction is that audio logic and physical hardware configuration are separate things.
For example, your Pd patch could contain something like:
[r knob1 @hv_param]That says, in effect, “give this object the hardware parameter named knob1.”
But knob1 is only a name. The compiler needs another piece of information:
"knob1": {
    "component": "AnalogControl",
    "pin": 16
}
Now the system knows that knob1 is an analog control attached to Daisy pin 16.
This separation makes custom Daisy hardware much more flexible. You can build a different enclosure, move a potentiometer to another usable ADC pin, or rename a control without having to redesign the entire DSP patch.
The Basic Daisy Seed Custom JSON Structure
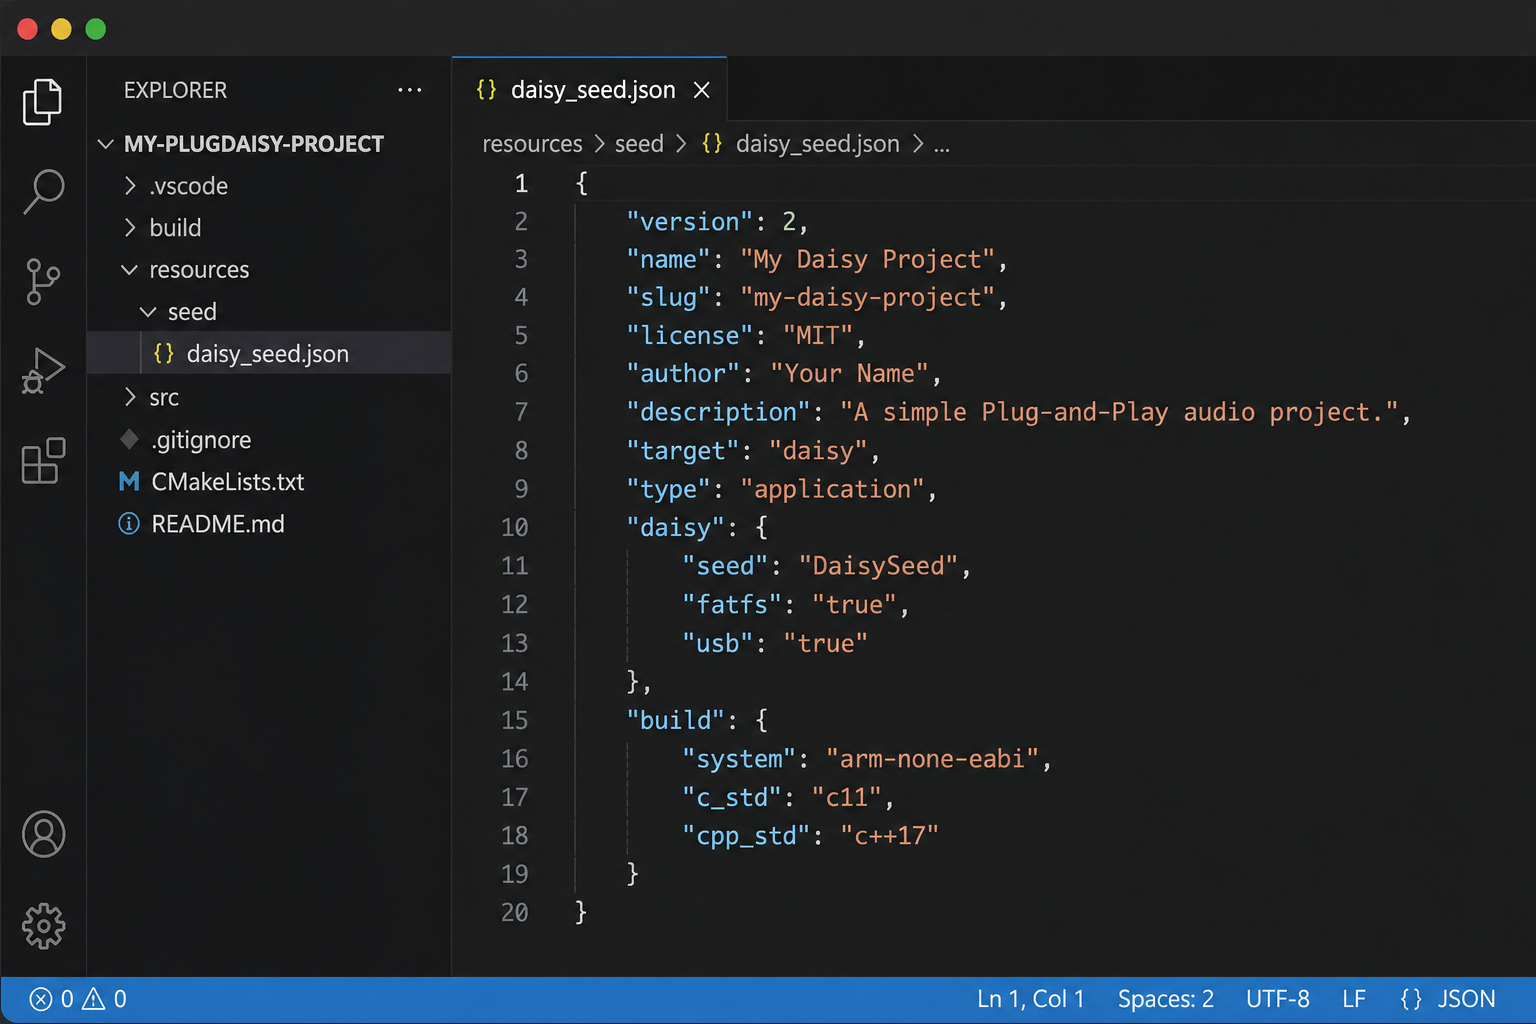
A simple custom JSON file can look like this:
{
    "name": "myDaisySynth",
    "som": "seed",
    "audio": {
        "channels": 2
    },
    "components": {
        "knob1": {
            "component": "AnalogControl",
            "pin": 16
        },
        "button1": {
            "component": "Switch",
            "pin": 7
        },
        "led1": {
            "component": "Led",
            "pin": 23
        }
    }
}
The exact components and their supported properties depend on the component definitions provided by json2daisy. The official Daisy documentation and examples use the same general structure: a board name, the system-on-module type, audio configuration, and a components section containing named hardware components.
name
"name": "myDaisySynth"This is the name of your custom board configuration.
It does not need to be the commercial name of a product. For a DIY synth, it can simply identify your project.
For example:
"name": "desktop_synth"or:
"name": "my_effect_pedal"som
"som": "seed"This identifies the System on Module being used.
For a standard Daisy Seed-based design, this is:
"som": "seed"The official custom JSON documentation uses seed for Daisy Seed hardware, and Electrosmith’s libDaisy API provides the corresponding Seed pin definitions.
audio
"audio": {
    "channels": 2
}
This describes the audio configuration.
A stereo Daisy application commonly uses two audio channels. The actual audio interface is handled by the Daisy/libDaisy platform; your custom JSON is primarily declaring how the board configuration should be treated by the generated project.
components
This is where the useful hardware mapping happens.
"components": {
    "knob1": {
        "component": "AnalogControl",
        "pin": 16
    }
}
Here:
knob1is your component’s nameAnalogControltells the compiler what kind of hardware it is16specifies the Daisy pin used by that component
The name becomes important when the Pd patch references the parameter.
Daisy Seed Pin Numbers Can Be Confusing
One of the most common sources of mistakes is that the Daisy Seed has several ways of referring to the same physical connection.
For example, the official libDaisy definitions identify:
D15asA0D16asA1D17asA2D18asA3D19asA4D20asA5D21asA6D22asA7D23asA8D24asA9D25asA10D28asA11
The official Seed datasheet likewise identifies the physical pin numbering and the corresponding ADC and digital functions.
This creates an easy-to-make mistake.
A board may show a physical pin number such as 23, while software documentation may describe the same connection using a Daisy digital name such as D16 or an analog alias such as A1, depending on the context.
When creating a JSON configuration, use the numbering expected by the JSON component definition and the Daisy tooling, rather than blindly copying whichever label happens to be printed on a wiring diagram.
For example, official examples use:
"knob1": {
    "component": "AnalogControl",
    "pin": 16
}
and the resulting configuration treats that as the specified Daisy pin.
Analog Controls: Potentiometers and Sensors
An analog control produces a continuously varying voltage instead of simply being ON or OFF.
Typical examples include:
- Potentiometers
- Faders
- Analog sensors
- Certain position sensors
- Control-voltage inputs
A basic JSON mapping is:
"cutoff": {
    "component": "AnalogControl",
    "pin": 16
}
The control can then be addressed from a compatible Pd patch using its name.
For example:
[r cutoff @hv_param]The current Daisy educational examples demonstrate this same pattern with custom names such as x_axis, where an AnalogControl is assigned to a specific ADC-capable pin and then read through an @hv_param object in plugdata.
This is particularly useful with DIY synthesizers because you can build a patch around meaningful names such as:
cutoff
resonance
pitch
mix
feedback
instead of thinking about raw pin numbers everywhere in the DSP patch.
Switches and Buttons
Buttons and switches are different from potentiometers because they normally provide a discrete digital state.
A simple definition is:
"button1": {
    "component": "Switch",
    "pin": 7
}
Depending on the component definition and the patch interface, switch-related objects can expose events such as press and release behavior. The official pd2dsy documentation, for example, lists switch components and variants for press and falling-edge events.
A switch might therefore be used to:
- Trigger an envelope
- Change presets
- Turn an effect on or off
- Select a waveform
- Start recording
- Step through menus
LEDs
LEDs are output devices rather than input controls.
A basic component might look like:
"led1": {
    "component": "Led",
    "pin": 23
}
The JSON tells the generated hardware layer which pin controls that LED.
One important detail is that electrical polarity and component behavior matter. In some circuits an LED may be active-low, meaning the logic value required to illuminate it is inverted. The json2daisy component definitions support properties related to LED inversion, and Daisy community examples specifically discuss the invert setting when LED behavior appears backwards.
There is also a separate UserLed component for accessing the onboard user LED on supported Daisy hardware through a custom configuration.
Encoders Need More Than One Pin
A rotary encoder is not the same as a potentiometer.
A potentiometer normally provides one changing analog voltage. An encoder commonly uses two digital signals, often called A and B, to determine rotation direction, and may also have a push-button switch.
A JSON definition can therefore require an object rather than a single numeric pin.
An official Daisy custom JSON example uses this structure:
"encoder": {
    "component": "Encoder",
    "pin": {
        "a": 26,
        "b": 25,
        "click": 13
    }
}
This illustrates why it is important not to invent JSON fields yourself. The available field names come from the component definition used by the Daisy JSON tooling.
What the JSON Does Not Do
A custom JSON file does not magically make arbitrary hardware work.
It describes hardware using component types that the Daisy tooling knows how to generate.
For example, writing:
"sensor": {
    "component": "MagicSensor",
    "pin": 15
}
does not make a new hardware driver appear.
The component has to be supported by the relevant json2daisy definitions or otherwise implemented in the underlying tooling.
This distinction becomes especially important with sensors connected over I²C or SPI. Those devices may require more information than a simple ADC or GPIO component. The Daisy community documentation has examples involving peripherals such as the MPR121 and BNO055, and discussions show that custom definitions can become significantly more involved when a device requires a hardware driver or special initialization code.
The parents Section for Additional Hardware
Some hardware does not connect to the Daisy as a simple one-pin component.
For example, an external MPR121 touch controller can be represented through a parents section:
"parents": {
    "mpr121_driver": {
        "component": "Mpr121"
    }
}
The exact configuration depends on the component definition and the version of the Daisy tooling you are using.
Recent Daisy tutorials show this approach for MPR121-based projects. The official Daisy site has also published examples where an MPR121 is declared in custom JSON and accessed from plugdata through objects such as:
[r mpr121_driver_ch0 @hv_param]with the channel number corresponding to an MPR121 touch channel.
This is fundamentally different from merely saying “pin 16 is a potentiometer.” The MPR121 is a separate peripheral device with its own protocol and multiple touch channels.
How the JSON Connects to Your plugdata Patch
The workflow is easier to understand when separated into three layers.
Layer 1: Physical hardware
You might physically connect:
- A potentiometer to an ADC pin
- A push button to a digital pin
- An LED to an output pin
Layer 2: JSON hardware map
Your JSON gives those components meaningful names:
"components": {
    "cutoff": {
        "component": "AnalogControl",
        "pin": 16
    },
    "trigger": {
        "component": "Switch",
        "pin": 7
    },
    "status_led": {
        "component": "Led",
        "pin": 23
    }
}
Layer 3: Pd/plugdata patch
Your patch then works with the names rather than raw hardware addresses:
[r cutoff @hv_param]or:
[r trigger @hv_param]and:
[s status_led @hv_param]This separation is what makes the system manageable. The JSON describes where the hardware is; the Pd patch describes what the hardware means.
A Complete Starter JSON Example
For a simple Daisy Seed project with two potentiometers, one switch, and one LED, you could start from a structure like this:
{
    "name": "myCustomDaisy",
    "som": "seed",
    "audio": {
        "channels": 2
    },
    "components": {
        "cutoff": {
            "component": "AnalogControl",
            "pin": 16
        },
        "resonance": {
            "component": "AnalogControl",
            "pin": 17
        },
        "trigger": {
            "component": "Switch",
            "pin": 7
        },
        "led": {
            "component": "Led",
            "pin": 23
        }
    }
}
The key point is that the names are yours, but the component types and pin assignments must match the actual hardware and the supported Daisy component definitions. The official Daisy documentation recommends using the board-definition examples and component definitions as references instead of inventing the structure.
How to Use the JSON File in plugdata
Current plugdata documentation says Daisy compilation is available through its compile interface. Daisy mode can select a target board and supports export modes such as source code, binary, and flashing, alongside options such as USB MIDI and patch-size configuration.
A typical workflow is:
1. Install a current desktop version of plugdata
The plugdata project provides the desktop application and integrated Heavy-based compilation workflow. A February 2026 release, v0.9.3, included several Heavy exporter fixes, including a correction related to dfu-util exit-status handling for Heavy-to-Daisy exports.
Because plugdata continues to change, use the current release and its bundled toolchain rather than following old tutorials blindly.
2. Create your JSON file
Save your board definition with a .json extension, for example:
myCustomDaisy.jsonUse a simple path without spaces for the project and export locations. The official plugdata compilation documentation explicitly warns that destination paths containing spaces can cause problems.
3. Make the names match your Pd patch
If your JSON contains:
"cutoff": {
    "component": "AnalogControl",
    "pin": 16
}
your patch should reference cutoff, not knob1, unless you actually named the component knob1.
4. Enable compiled mode
plugdata’s compiled mode checks whether your patch is compatible with the Heavy compiler and highlights unsupported functionality. Heavy does not support every possible Pd object or external, so a patch that works on the desktop is not automatically guaranteed to compile for Daisy.
5. Choose the Daisy target
In the compile interface, choose the Daisy target and then select the custom JSON configuration when appropriate.
Recent Daisy tutorials published by Electrosmith demonstrate exactly this general workflow: choose Custom JSON, open the project-specific JSON definition, and then compile/flash the resulting program.
6. Put the Daisy into a flashable state when required
For flashing workflows using the Daisy Seed, Electrosmith’s tutorials describe holding the BOOT button while connecting USB to place the board into a state suitable for flashing. The precise procedure can depend on the tool and hardware revision, so follow the instructions shown by the current plugdata/Daisy workflow you are using.
The Most Common Custom JSON Errors
Custom JSON problems are often frustrating because the JSON itself can look perfectly reasonable while the compiler rejects it.
Several recurring issues are particularly important.
Capital Letters in Component Names
This is a surprisingly common source of errors.
A Daisy community report showed a configuration using:
"Gate1_Trig": {
    "component": "GateIn",
    "pin": "13"
}
The resulting problem was traced to the component name capitalization. The documented fix was to use a lowercase component name such as:
"gate1_trig": {
    "component": "GateIn",
    "pin": 13
}
The community explanation notes that component names are converted to lowercase when used by the patching system.
For a robust convention, use names such as:
knob1
cutoff
button1
gate_in
status_led
instead of:
Knob1
Cutoff
Button1
GateIn
StatusLED
Spaces in File Paths
The Heavy exporter documentation warns against destination paths containing spaces. Older Daisy/plugdata documentation also reports path and filename limitations in the Heavy compilation process.
A safer project path is:
C:\DaisyProjects\MySynth\rather than:
C:\My Daisy Projects\My Synth\Wrong Pin Number
If the JSON says:
"pin": 16but the potentiometer is physically connected elsewhere, the software cannot compensate for the incorrect wiring.
This is why you should verify the pin against the current Daisy Seed pinout and your actual PCB wiring. Electrosmith’s current Seed documentation lists the supported digital and analog mappings, while libDaisy exposes them through its seed pin definitions.
Wrong Component Type
A potentiometer should not simply be declared as a generic switch because both are connected to GPIO-capable hardware.
For example:
"cutoff": {
    "component": "AnalogControl",
    "pin": 16
}
is conceptually different from:
"button": {
    "component": "Switch",
    "pin": 7
}
The component type determines how the generated code initializes and reads the hardware.
Patch Name Does Not Match JSON Name
If your JSON declares:
"cutoff": {
    "component": "AnalogControl",
    "pin": 16
}
but your Pd patch asks for:
[r frequency @hv_param]there is no automatic reason for frequency to refer to cutoff.
The names need to agree.
Inventing Unsupported Component Properties
A JSON configuration is not an arbitrary configuration language.
Properties such as pin, component, invert, encoder subfields, or peripheral-specific settings must correspond to what the component definition actually supports.
The authoritative reference for this behavior is the Daisy json2daisy component definition set, not an unrelated example found online.
A JSON File Is Not the Same as component_defs.json
This distinction is extremely important.
You may encounter two different kinds of JSON files while researching Daisy and plugdata:
Your custom board JSON
and
component_defs.json
They are not interchangeable.
Your custom JSON might look like:
{
    "name": "myCustomDaisy",
    "som": "seed",
    "components": {
        "knob1": {
            "component": "AnalogControl",
            "pin": 16
        }
    }
}
By contrast, component_defs.json is part of the json2daisy machinery and describes how supported component types are translated into generated code.
The official json2daisy repository contains those component definitions as part of the tool itself.
That means you generally should not edit `component_defs.json just because you need a custom knob or button. Your normal task is to create a custom board JSON using already-supported component types.
Special peripherals may be an exception when the current tooling does not expose the hardware configuration you need. Historical community projects have modified component definitions for particular sensor setups, but those are specialized workarounds and should not be treated as the normal Daisy Seed workflow.
Daisy Seed vs. Daisy Patch SM
Another common mistake is assuming every Daisy-based board uses the same pin mapping.
The Daisy Seed and Daisy Patch SM are different system-on-module configurations with different pin naming and board-level wiring.
Daisy community guidance explicitly warns that Seed and Patch SM use different pin names and recommends checking the appropriate pinout and corresponding board JSON.
So a JSON created for a Seed-powered custom synthesizer should not automatically be copied to a Patch SM design.
The same principle applies to carrier boards and commercial products that use the Daisy Seed as their computing module. The module may be identical, but the carrier board determines what is physically connected to each pin.
Daisy Seed 2 Changes Worth Knowing
The current libDaisy source includes support for multiple Seed board revisions, including the original Daisy Seed, Daisy Seed 1.1, and Daisy Seed 2 DFM. The Seed 2 DFM adds additional digital and analog pin aliases in the current libDaisy definitions.
That is important when working from older tutorials.
A tutorial written for an older Daisy Seed revision may show pin mappings or hardware assumptions that do not exactly correspond to a newer board.
The safest approach is to verify:
- The exact Daisy hardware revision
- The current Electrosmith pinout
- The current libDaisy definitions
- The component definitions used by the version of the tooling you are running
This prevents an old tutorial from becoming an accidental wiring specification.
How to Design a Good Custom JSON File
A good custom configuration is usually simple and descriptive.
Instead of this:
"components": {
    "a": {
        "component": "AnalogControl",
        "pin": 16
    },
    "b": {
        "component": "Switch",
        "pin": 7
    }
}
use names that describe their purpose:
"components": {
    "cutoff": {
        "component": "AnalogControl",
        "pin": 16
    },
    "trigger": {
        "component": "Switch",
        "pin": 7
    }
}
This makes the Pd patch easier to understand months later.
A project with:
[r cutoff @hv_param]
|
[lop~]
is immediately understandable.
A patch full of names such as:
[r a @hv_param]is much harder to maintain.
How to Troubleshoot a JSON Compilation Failure
When a custom Daisy JSON fails, avoid changing five things at once.
Start with the simplest possible configuration.
Test the JSON structure
Make sure:
- Braces are balanced
- Property names use double quotes
- Values have the correct JSON type
- Commas are present where required
- The file is valid JSON
For example, this is valid:
{
    "name": "test_board",
    "som": "seed",
    "components": {
        "knob1": {
            "component": "AnalogControl",
            "pin": 16
        }
    }
}
Test a single component
Start with one control:
"knob1": {
    "component": "AnalogControl",
    "pin": 16
}
Compile a very small patch that simply reads that control.
If that works, add the switch.
Then add the LED.
Then add more complicated peripherals.
This isolates the source of the failure instead of trying to debug an entire synth and custom hardware stack simultaneously.
Check the compiler’s exact name
An error such as:
Unknown parameter "faderLeft"should immediately make you check whether the JSON actually defines:
faderLeftor:
faderleftCase and naming conventions matter in this workflow. Daisy community reports have demonstrated exactly this kind of capitalization-related failure.
What Happens Behind the Scenes
The workflow can look almost magical when everything works:
Pd Patch
   ↓
plugdata / Heavy
   ↓
Hardware parameter names
   ↓
Custom Daisy JSON
   ↓
json2daisy
   ↓
libDaisy-compatible C++
   ↓
ARM compilation
   ↓
Daisy firmware
The JSON itself is therefore not the firmware.
It is input to a code-generation process.
json2daisy converts the board description into C++ support code, while the Heavy-based exporter handles the transformation of the compatible Pd patch into generated code suitable for the target.
This is also why a malformed or unsupported JSON definition can produce a C++ compilation error that initially looks unrelated to the JSON you wrote. The mistake may only become obvious after the definition has been expanded into generated source.
Why Custom JSON Is So Useful for DIY Synthesizers
The biggest advantage is hardware abstraction.
Imagine a synthesizer with six knobs, two buttons, a gate input, and an LED.
Your physical circuit might be:
| Control | Type | Example Daisy mapping |
|---|---|---|
| Cutoff | Analog | Pin 16 |
| Resonance | Analog | Pin 17 |
| Envelope | Analog | Pin 18 |
| Mix | Analog | Pin 19 |
| Pitch | Analog | Pin 20 |
| Level | Analog | Pin 21 |
| Trigger | Switch | Pin 7 |
| Mode | Switch | Pin 8 |
| Status | LED | Pin 23 |
Your Pd patch does not need to be built around those raw numbers.
Instead, it can operate with meaningful names:
cutoff
resonance
envelope
mix
pitch
level
trigger
mode
status
That makes the DSP design cleaner and makes future hardware changes easier.
The Daisy ecosystem is specifically intended for embedded audio applications, and Electrosmith positions the Daisy Seed as a general-purpose platform for custom audio hardware.
When You Should Not Use a Custom JSON File
You do not necessarily need to create one for every Daisy project.
plugdata supports predefined Daisy targets, and the official tooling includes board definitions for several supported boards. Custom JSON becomes especially valuable when your hardware layout is not represented by an existing board definition.
For example, if you are using a supported board with the standard controls already mapped, using its existing target can be easier than creating a duplicate custom definition.
A custom JSON makes more sense when you have:
- A breadboard prototype
- A DIY synthesizer
- A custom PCB
- Your own pedal design
- A sensor interface
- A non-standard control layout
- A Seed-powered product or prototype
Important Security and Reliability Considerations
A JSON file may look harmless because it is only configuration data, but the broader compilation toolchain is capable of generating and compiling native code.
For that reason, do not blindly use custom JSON files or modified component definitions from unknown sources.
A trustworthy workflow is to inspect the JSON and understand what components it declares before compiling it. This is especially important when a project also asks you to replace component_defs.json, install custom toolchain files, or modify compiler resources.
An ordinary custom board definition should generally describe your hardware. It should not require you to blindly replace compiler internals merely to make a basic potentiometer, switch, or LED work.
Current plugdata Status for Daisy Users
The plugdata project remains actively developed. Its v0.9.3 release on February 14, 2026 included Heavy exporter changes and specifically fixed an incorrect dfu-util exit status for Heavy-to-Daisy exports. That is relevant because dfu-util is involved in device programming workflows.
The official plugdata documentation also continues to describe Daisy as a supported embedded target, with configurable export and flashing options.
At the same time, the ecosystem contains many older tutorials. Some are still technically useful, but paths, UI labels, toolchain behavior, and workarounds may have changed.
A good rule is to use older tutorials primarily for concepts and examples, then verify the actual configuration against the current plugdata, Daisy, libDaisy, and json2daisy documentation.
Frequently Asked Questions
What is a Daisy Seed JSON file in plugdata?
It is a hardware configuration file that describes how your physical controls and peripherals are connected to a Daisy-based board. plugdata uses that information during compilation so hardware parameters in the Pd patch can be connected to the correct Daisy interfaces.
Do I need a custom JSON file for every Daisy project?
No. A custom JSON is primarily needed when your hardware setup is not already represented by a suitable built-in board definition. Standard supported boards can use their existing configurations.
Where should the custom JSON file be selected?
In plugdata’s Daisy compilation workflow, use the custom-board option when configuring the Daisy target and select your JSON board definition. Current Electrosmith tutorials demonstrate the Custom JSON workflow before compilation and flashing.
Can I call my component Knob1 instead of knob1?
It is safer to use lowercase component names. Daisy community reports have documented compilation problems caused by capital letters in custom component names.
Can a JSON file make any sensor work with Daisy?
No. The sensor or peripheral must be supported by the relevant Daisy tooling, or additional software support must exist. A JSON definition alone cannot create a missing hardware driver.
Why does my potentiometer read nothing?
First verify the physical wiring, especially power and ground, then verify that the selected pin is actually an ADC-capable Daisy pin and that the JSON uses the correct pin number and AnalogControl component. The official Seed documentation and libDaisy pin definitions are the appropriate references for checking the mapping.
Why does my LED behave backwards?
The LED circuit may be active-low, meaning the logic is inverted. The json2daisy component definitions support inversion for LED configurations, and Daisy community examples specifically identify invert as a setting that can correct reversed LED behavior.
Can I use a Daisy Seed JSON file for a Daisy Patch SM?
Not automatically. The Seed and Patch SM use different pin mappings and board configurations. Use the correct JSON definition for the actual system-on-module and carrier hardware.
Is component_defs.json my custom board file?
No. Your custom board JSON describes your hardware. component_defs.json is part of the underlying json2daisy component-definition system that explains how supported component types are translated into generated code.
The Practical Takeaway
For Daisy Seed + plugdata, the custom JSON file is best understood as a translation layer between your wiring and your Pd patch.
The essential pattern is:
{
    "name": "my_board",
    "som": "seed",
    "audio": {
        "channels": 2
    },
    "components": {
        "my_control": {
            "component": "AnalogControl",
            "pin": 16
        }
    }
}
Then your plugdata patch can reference:
[r my_control @hv_param]The exact pin must correspond to your real wiring, the component type must be supported by the current Daisy JSON definitions, and the component name should be kept simple and lowercase.
The most important mistake to avoid is treating a custom JSON file as a generic “settings file.” It is actually a description of a specific hardware design. Change the wiring, change the board revision, or change the peripheral, and the appropriate JSON configuration may need to change as well.
For current projects, the most reliable references are the official plugdata compilation documentation, Electrosmith’s Daisy documentation, libDaisy’s current pin definitions, and the json2daisy component definitions rather than copied JSON snippets from older tutorials.
Also Read: Pipeboard Meta Ads MCP Pricing | Is the Free Plan Really Free?

1 Comment
Pingback: Gold Price Per Gram EUR Free API Python